How do I install and set up an eSIM on my iOS device (iPhone or iPad)?

eSIM Einrichtung Schritte

Step 1: Adding eSIM

Go to Settings on your device
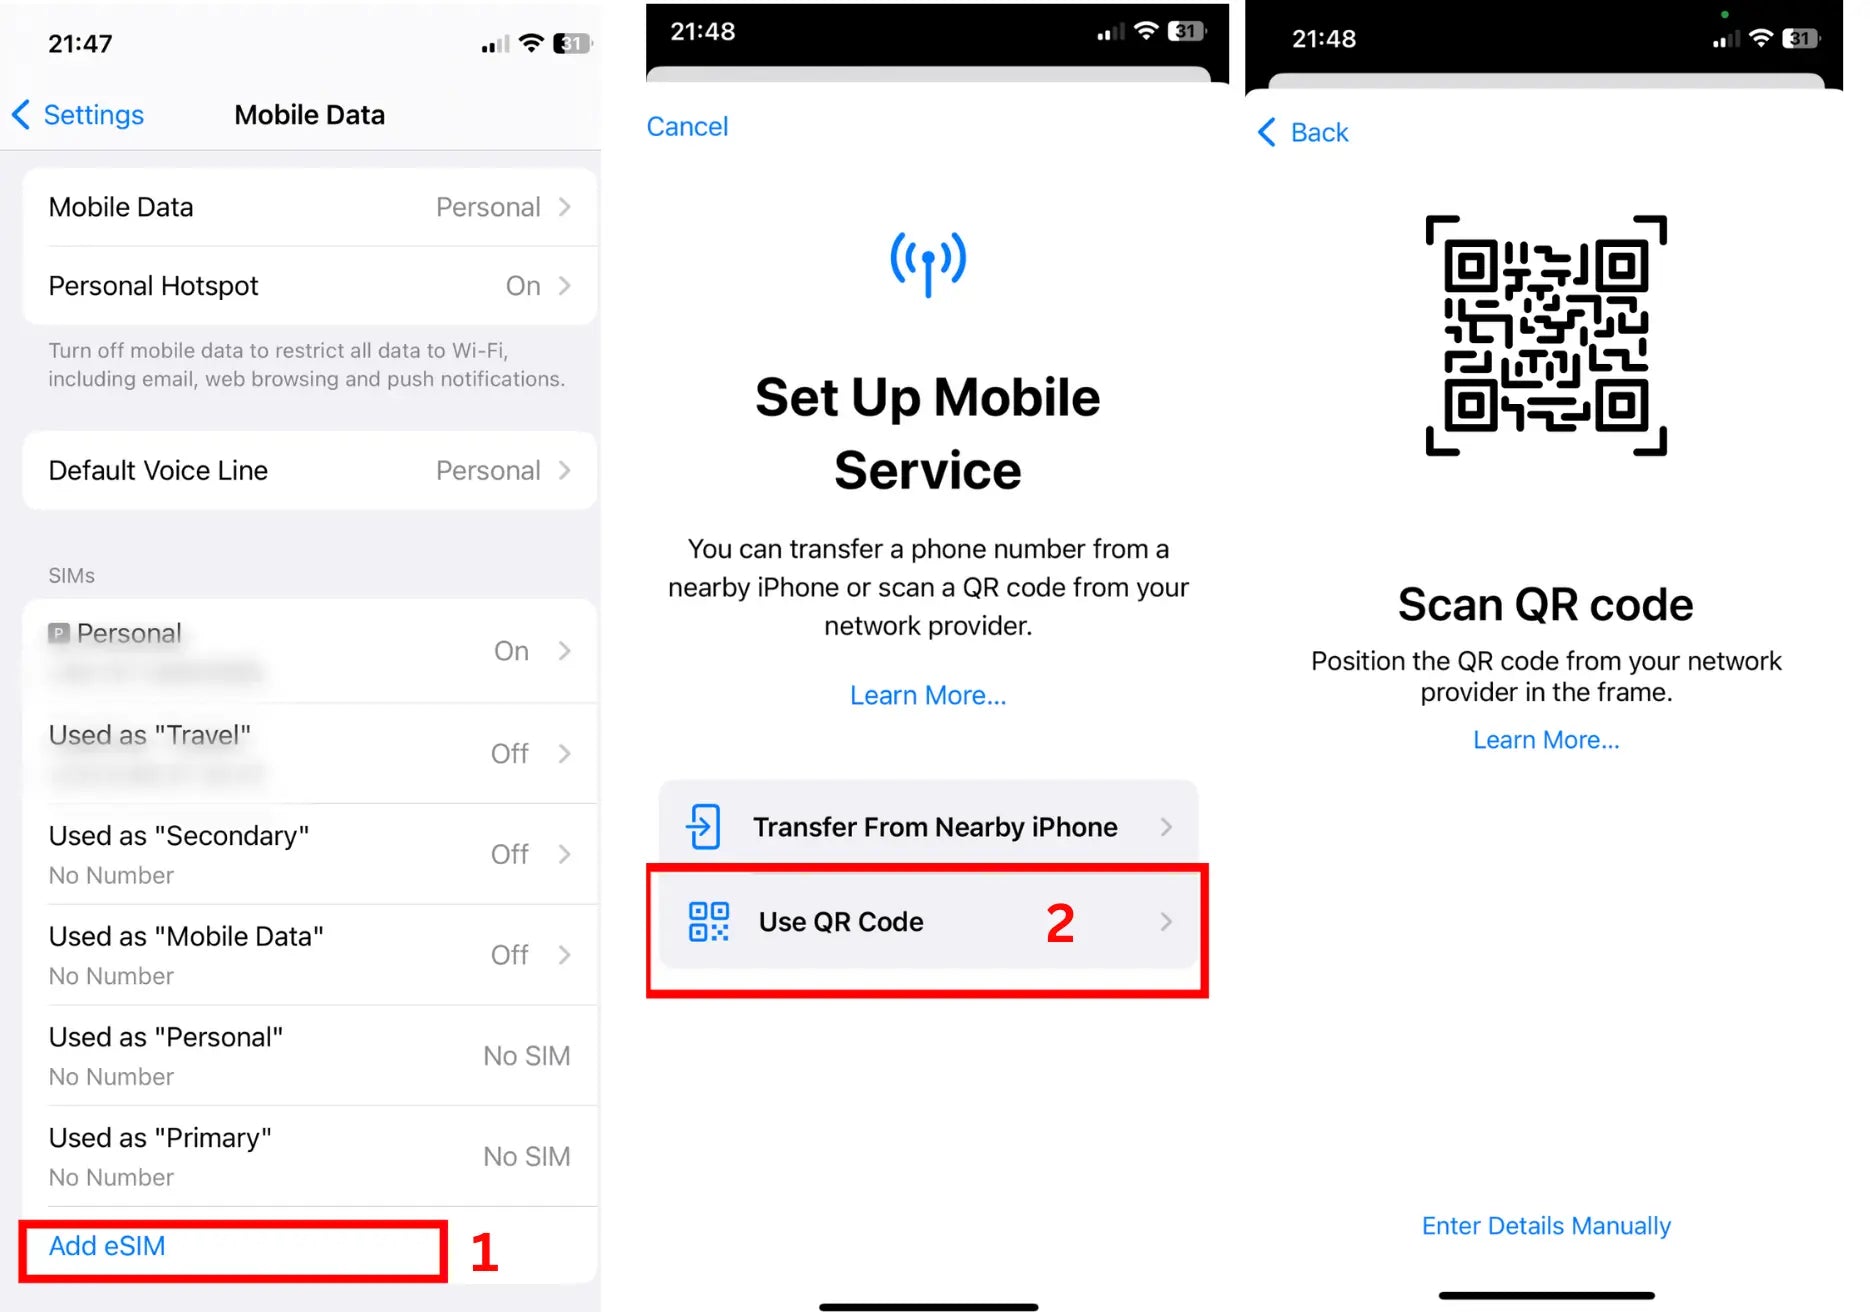
  • . Go to Settings on your device and Tap Mobile / Cellular Data.
  • . Tap Add eSIM and Tap Use QR Code.
  • . Scan your eSIM QR code using either the printed QR code or another device displaying the QR code.
eSIM Aktivierung Schritt 2

Step 2: Activating the eSIM


Tap on the prompt 'Continue'.
  • Tap Continue. Allow up to 10 minutes for the eSIM to Activate.
  • Tap Done.
    eSIM Etikett

    Step 3: Change eSIM name(eSIM Label)

    You have the option to modify the eSIM Label (the name of the eSIM) instead of using the default name.
    If you would like to modify the eSIM label before moving to the next step:
  • Tap > (the right hand arrow) and then either choose one of the preset label's or type the name eSIMFOX in the Custom Label box.
  • Tap Done and Tap Continue.
  • Standardleitung wählen

    Step 4: Settings for the eSIM

    Choose your Default Line
    • Set Default Line always to Primary and Tap Continue.
    • Set iMessage & FaceTime always to Primary and Tap Continue.
    • Set Mobile Data to your previously chosen eSIM label.
    • *Keep “Allow Mobile Data Switching” turned off to avoid additional roaming charges.
    Nutzung der eSIM-Daten

    Step 5: Start using your eSIM data

    The eSIM is now installed and configured.

    We recommend activating the eSIM only at the destination.

    Important: Data Roaming MUST be ENABLED in order for the eSIM to work!

    Your iPhone may activate the plan immediately. To avoid using data before your trip, turn off roaming on all your mobile data plans and turn it on when you have arrived at your destination.

    • • Go to "Settings" and Tap "Mobile / Cellular Data".
      • Select desired SIM and Move the toggle switch to "On".